Almost all Android smartphones have the ability to install the custom firmware, which has extended functionality compared to the stock one. The user gets additional opportunities to customize his phone. But not everyone knows what exactly the Realme custom firmware is used for and how to install it correctly in order not to harm the mobile device. In this article we will consider this question in detail.
What is Custom Recovery and what is it for?
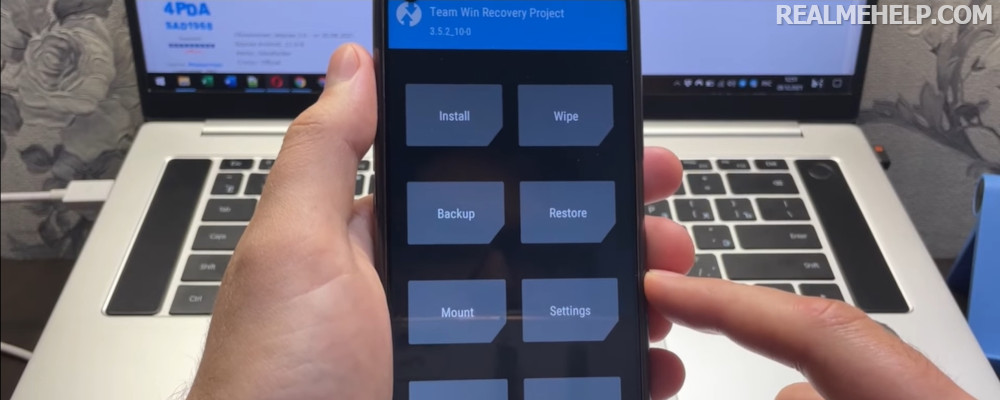
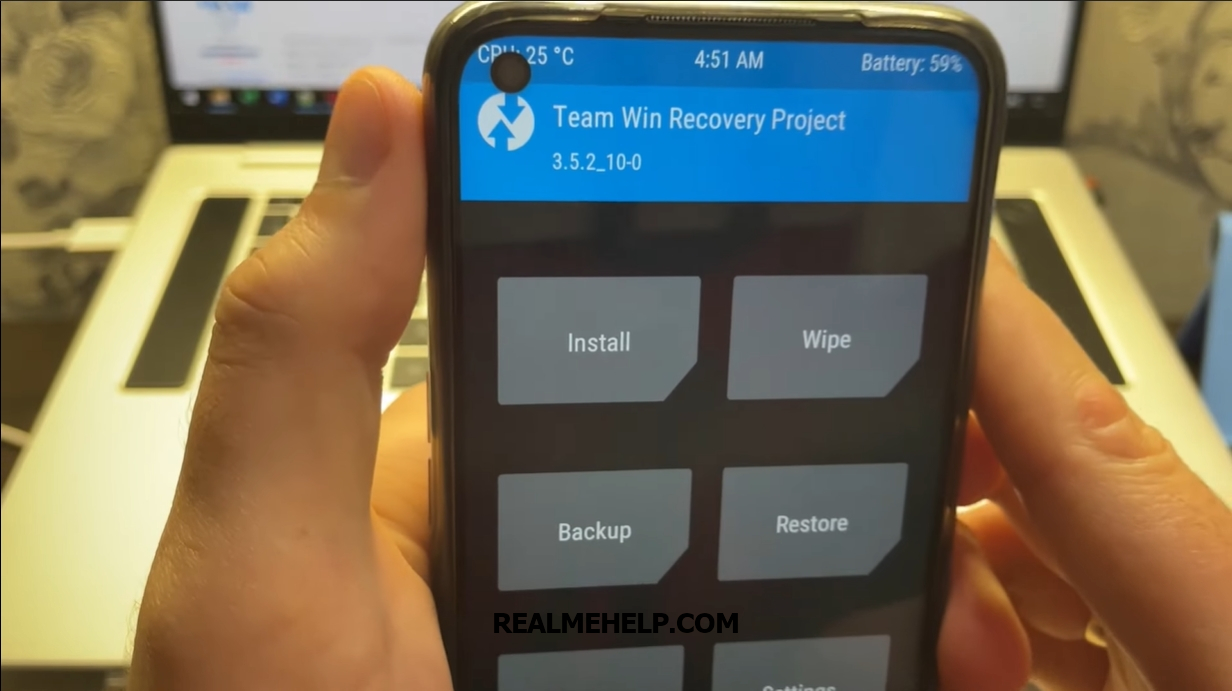
Custom Recovery is an extended software project that allows you to perform complex system operations on your smartphone. The most popular custom recovers are TWRP. After installing it, an experienced user will be able to:
- Put custom firmware on the phone.
- To configure root rights (Super SU).
- Reset the device to factory default settings.
- Format system partitions.
- Restore the system backup.
- Install Magisk and additional modules.
But you should keep in mind that the installation of the custom firmware is a complicated and multi-step procedure. If you carry out any action incorrectly or skip a certain step - the phone will "crash". Therefore, be careful when installing TWRP Recovery.
Installing TWRP Recovery on Realme phone
The example will be performed on Realme 6 with Android 10. On Android 11 you can't put the custom recovers on the official firmware at the moment. Checked just now, recuperation does not load at all, neither stock nor custom. You can only do root rights through Magisk, but again without using the recovers. In general, I will not go into this point. I can only say that before starting the procedure, it is recommended to study the threads on 4PDA and XDA. Maybe on your model everything will work and Realme UI 2.0.
Step 1: Preparation
What you need for this instruction:
- Unlock the bootloader.
- Do roll back from Android 11 to Android 10.
- Download ADB files.
- Find the vbmeta.img file on 4PDA or XDA (your model's branch).
- Download the custom recovers for your model itself. I will use the official TWRP build for Realme 6.
And additionally you need to download either Magisk or custom firmware (any, search 4PDA/XDA).
The magisk or firmware must be installed immediately after entering the custom recovers, so that it doesn't get overwritten by the stock one. Read more in our articles about root rights and installing third-party firmware, or see the video tutorial at the end of the article.
Step 2: Checking
The instructions are universal, all the commands are suitable for any version of Android. But, in my example, it works only on Android 10.
In order to install the custom recovers, we need to:
- Enable USB debugging.
- Take the complete USB cable or the original from OPPO.
- Charge the phone more than 60%.
- Have access to Windows 7 or higher. The example would be Windows 10.
Step 3: Performing
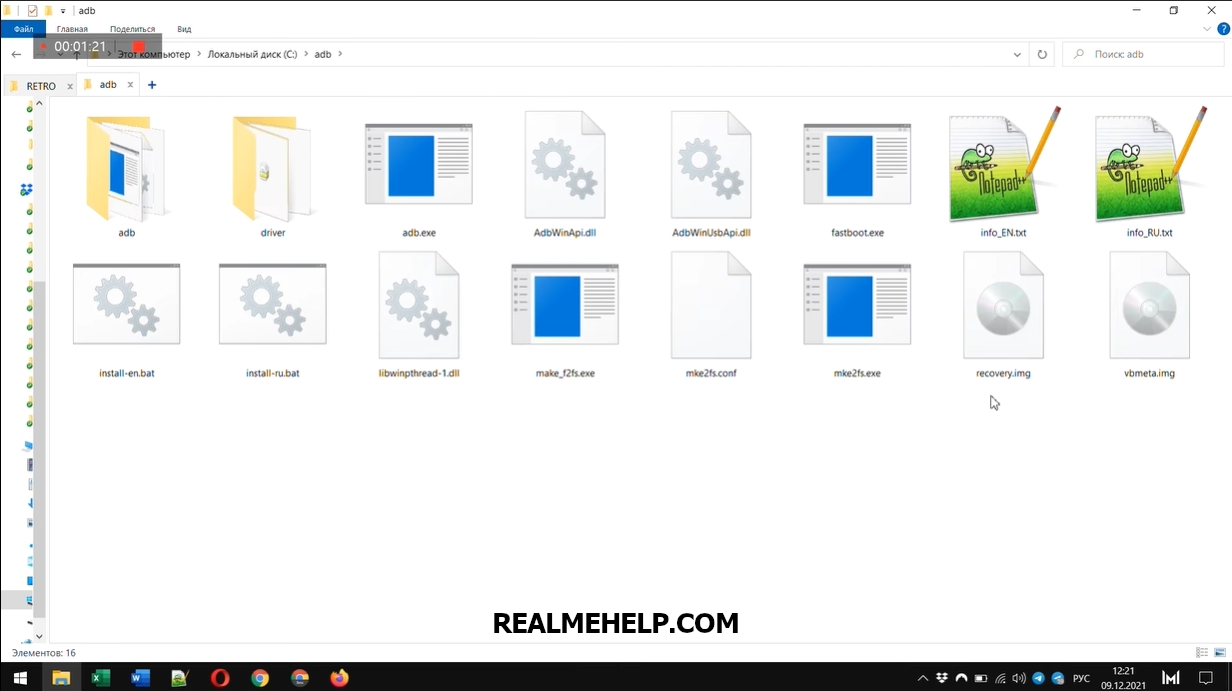
- Download the ADB files, move the archive to the system drive (usually the drive C), unpack and install them.
- Download the recovery image and vbmeta. Transfer it to the ADB folder.

- Check that the file names are recovery.img and vbmeta.img, if not, rename it.
- Make sure that USB debugging is enabled.
- Connect the phone to the PC with the original cable, select data transfer.
- At the first connection, a request will appear on the phone, approve it.
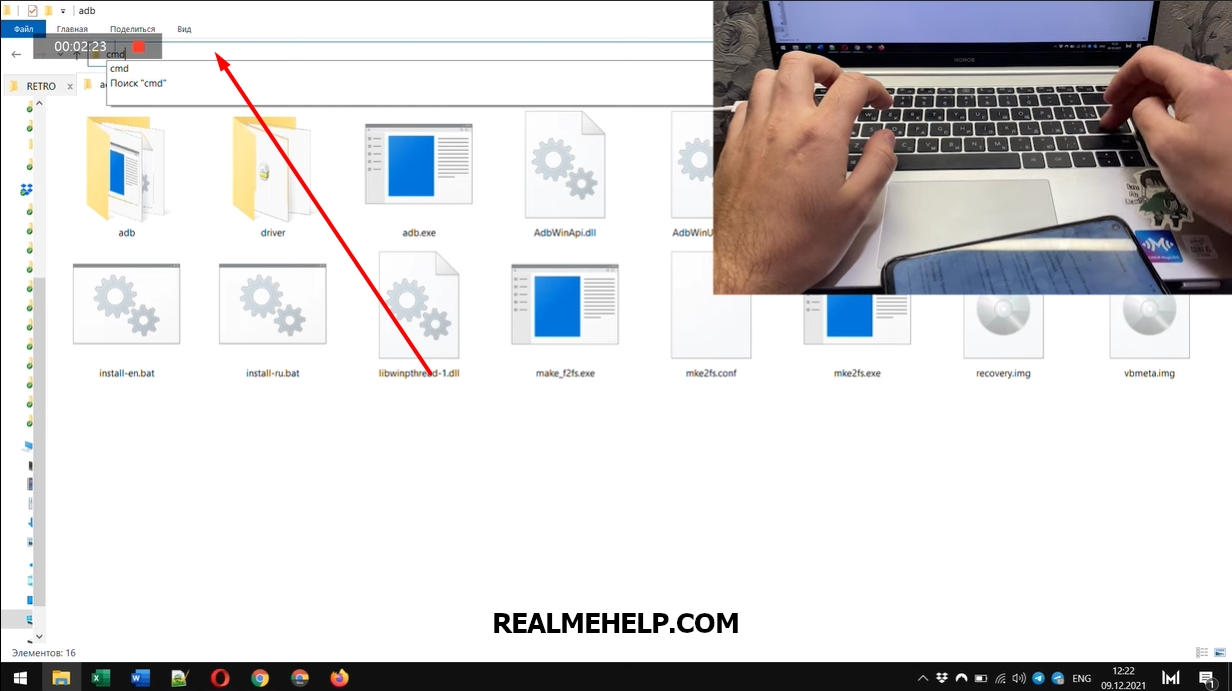
- In the ADB folder in the address bar, write CMD, the console will open.
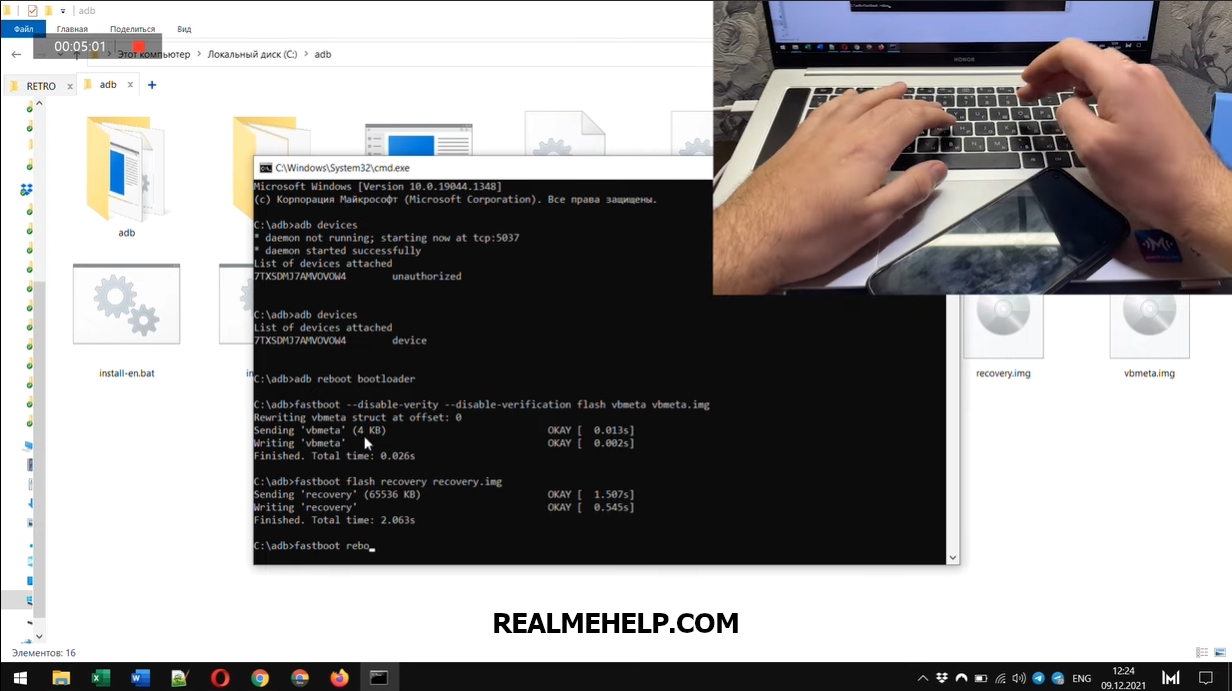
- Write a command in the console adb devices If the device ID appears, then move on.
- Now booting into Fastboat mode, command: adb reboot bootloader .
- After downloading, install vbmeta: fastboot —disable-verity —disable-verification flash vbmeta vbmeta.img .
- Next, enter another command to flash the recovers fastboot flash recovery recovery.img .
- Now with the command fastboot reboot recovery booting into the custom recovers.
realmehelp.com - Now you have to immediately put either Magisk or custom firmware without leaving the recauvery, so it does not overlap the stock recauvery.
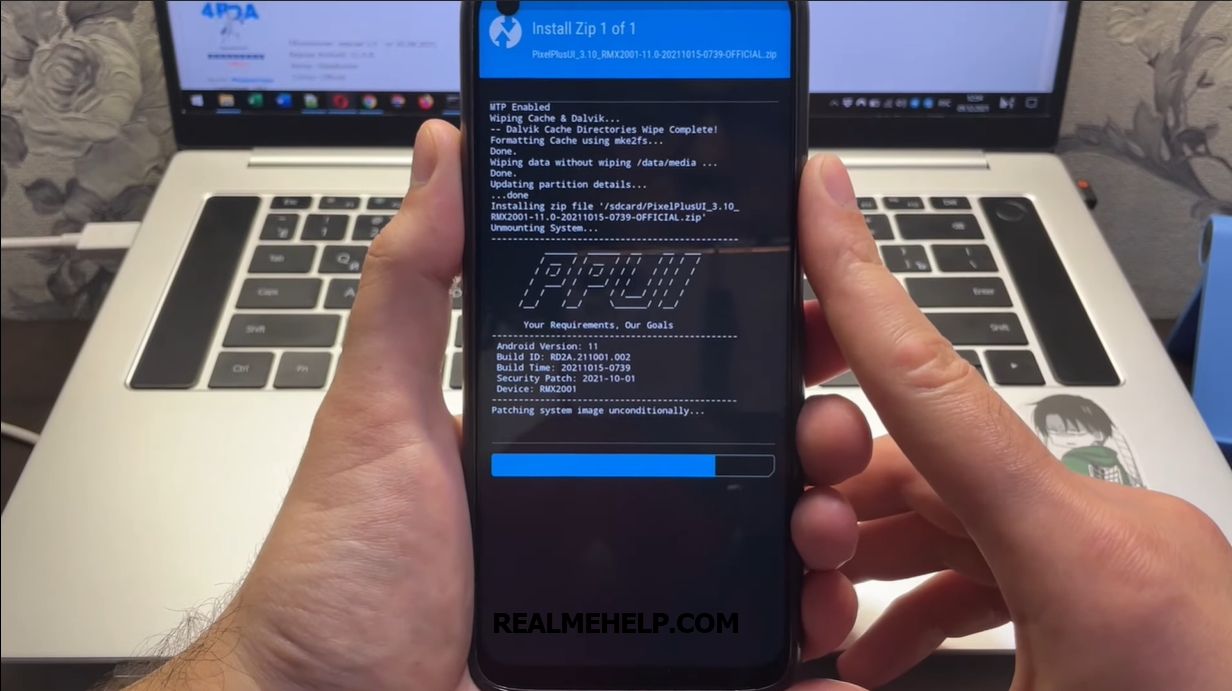
Example of custom firmware installation.

Video tutorial
All the steps are shown in this video, if the text version is difficult, just refer to this video.
That's basically all. If you follow all the steps, correctly enter the commands and choose the right files for your Realme phone, you'll be able to put any custom recovers (TWRP, as in this example) without any problems. If you have any questions write below in comments.

Здравствуйте! Выполнил все манипуляции, изложенные в данной теме (https://realmehelp.com/how-to-install-twrp-recovery-on-realme/). Всё прошло гладко, как и на скриншотах. Но в рекавери телефон уходить не хочет. При загрузке, как обычно появилась надпись «Orange state», но под ней написано еще следующее «your device has been unlocked and can’t be trusted». Далее через 5 секунд телефон перезагружается в систему. И на этом всё. Помогите пожалуйста, как всё ж таки поставить кастом рекавери. Заранее спасибо!
Нигде не могу найти бут и вбмета 70 прошивки. НИ НА 4ПДА НИ НА XDA НЕТУ! Где найти
What should I do if my phone doesn't go into recovery when I write the last command?
How do I get back the stock recovers?
Если ты переименовал тврп в twrp.img тебе нужно будет написать fastboot flash recovery twrp.img.img а если ты переименовал просто в twrp тогда с одной .img